

INSPIRATION
one of Michele clamp’s animal watercolor tutorials is a male cardinal. Christmas is coming up and working with red seems like a fun idea.
Notes from the video about her approach.
- “Bird art gives us watercolor painters a great opportunity to exploit the sploshiness of watercolor.”
- Start with pencil drawing, very light.
- Look at where the light comes from. Figure lights and darks.
- Figure out colors.
- “Go nuts and paint through the edges.” Dabs of red, orange, gray (for perch), and blue (on lower wing) paint, then softening edges with a clean damp brush. Keep the paint light. Resist the urge to stay within the lines but stay away from the area you want to detail (in this case, the face face.) She really pushes paint into the background.
- Splatter paint and spray water. (Not sure I can do this.)
- Let dry.
- Put in some face detail. She still softens some edges.
- Put in some darks to define the form. Wings, tail, belly, feet, miscellaneous connecting strokes.
- Let dry.
- Adjust final details. Reclaiming edges, putting in darks – on wing. Perch. Feet. Tail. Top of the head, darken red around face, more detail on face. Darken perch under bird.
- Throughout she is softening and splattering.
Later, I remembered that my paper orientation is different than hers, and chose a different, more horizontal image (from Adobe stock)
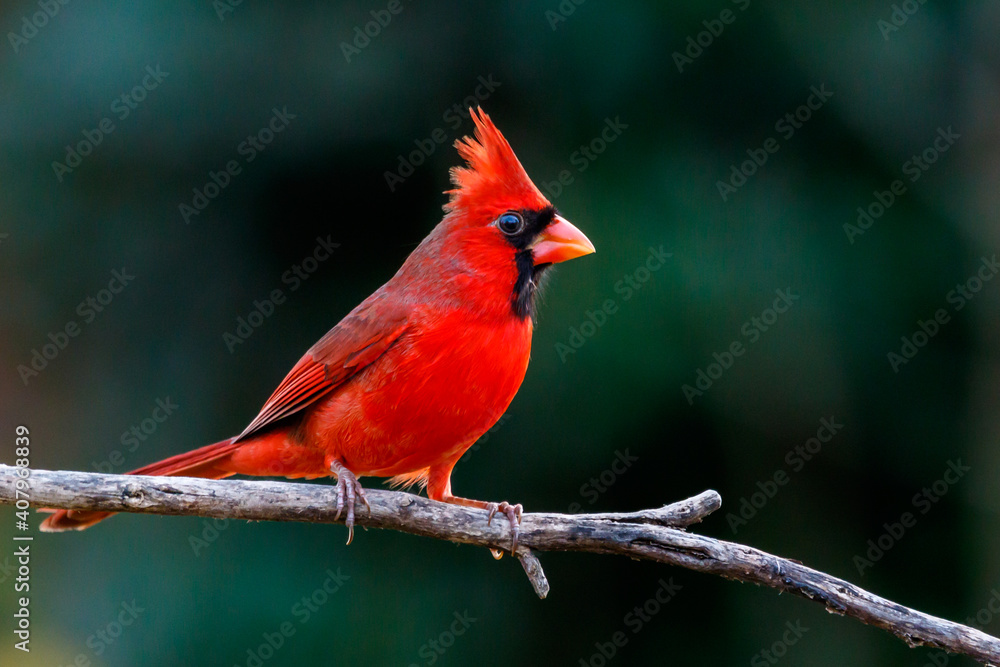
CREATION/SESSION LOG
- I drew the bird today. I think my bird is a little fatter than hers. It took some erasing, but I am happy with where I am. (Note: get a kneaded eraser.)
- Chose colors today. Ended with a red and an orange-red. I also have a gray and meant to have blue, but forgot about it. I laid in some color and tried to use her “soft edge” technique. It was pretty uncomfortable to plow through the edges. I avoided the face. Paint is pretty light at this point. Did not do splatter or spray with water.
- I painted most of the head and body today. I feel like I lost the purpose of the lesson. My bird is tight. I avoided the wing and tail because those areas are dark… They look like they need black. Checking the video, I see that she used some dark brown when she painted the “loose” wings. I tried to paint the beak and was pretty unsuccessful. It, too, looks tight and not at all transparent or watery. Is there any way to recover sploshiness? I doubt it.
- Today I painted wings, feet, and added shadow to the twig. I gave up on sploshiness and just painted the way I usually do.
- I have one more session left, where I will do something with the beak, finish up anything else that’s bugging me, and probably put in some background.
- I did. For the background, I experimented with putting in paint and then adding water, as Michele does. Sometimes that worked.
INSIGHTS
- What surprised me?
- That I wanted to take such detailed notes on the video (again).
- That I couldn’t follow her directions.
- What have I learned?
- I really like this technique/style, but I did not achieve it this time.
- A way of adding paint and then water.
- Breaking the painting into snippets, I discovered it was muddy. This is partly because I swooshed red and then covered it with green. It’s a bit tortured.
- What do I want to learn or try?
- I wonder if I can use this technique on other animals?
- I want to get better at using water and paint.
- I want to try letting go of attempted realism in favor of something more fun.
I consciously let go of the theme to work on this painting, so I don’t have thoughts about that.
Working on this painting taught me about the “stickiness” of my default style. I long for something less “realistic,” looser, and more playful. Can I do that? Goals for next year.